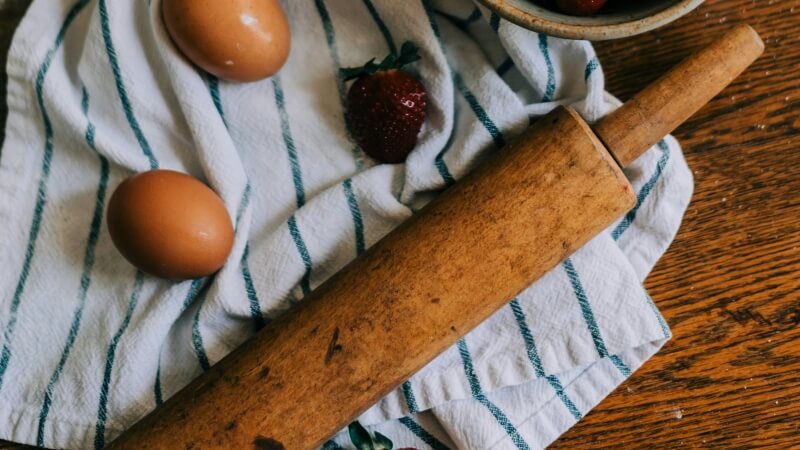
An embossed rolling pin can take your baked goods from basic to beautiful. The engraved patterns on the roller add an extra dimension of texture and detail to cookies, pie crusts and pastries.
With the right techniques, you can use an embossed rolling pin to easily create bakery-quality treats right in your own kitchen. This ultimate guide covers everything you need to know to get the most out of your embossed rolling pin.

Choosing an Embossed Rolling Pin
The first step is selecting the right embossed rolling pin for your needs. Here are the main factors to consider:
Material
Embossed rolling pins come in a variety of materials including wood, marble, ceramic and silicone.
- Wood – Maple and beechwood are common choices that hold engraved patterns well and provide a smooth rolling action. Avoid softwoods like pine that may not withstand embossing.
- Marble – Retains cold temperatures, which helps when working with pastry. Looks beautiful for serving pies.
- Ceramic – Holds heat or cold nicely. Great if you want to chill dough while rolling to get a sharper imprint.
- Silicone – Lightweight and non-stick but doesn’t hold intricately engraved patterns as well.
- Metal – Often used for textured patterns rather than engraved motifs. Transfers designs cleanly.
Pattern
From basic grid designs to intricate florals, embossed rolling pins come in endless pattern options. Consider what designs will work best for your typical baked recipes.
- Overall patterns – Great for rolling out large sheets of dough for cookies or pastries. Choose repeated dots, diamonds, waves or stripes.
- Large motifs – Try pretty leaves, flowers or butterflies for pie crusts and galettes.
- Seasonal themes – Snowflakes, pumpkins and hearts make fun holiday pins.
- Words and phrases – Custom pins can imprint names, dates or greetings for special occasions.
Size
Standard rolling pins are around 20 inches long, but there are also shorter and longer options.
- Mini pins – Around 10 inches long and ideal for small batches of cookies. Easy to store.
- Slim pins – Shorter in diameter, making them good for smaller hands.
- Jumbo pins – Extra long at 24+ inches for rolling out oversized pastries quickly.
- Adjustable pins – Can extend to 30+ inches; convenient for storage.
Ease of Use
Look for an embossed pin with a comfortable, easy-grip handle.
- Tapered ends – allow you to roll over the top of the pin, applying even pressure.
- Ball bearing wheels – For very smooth rolling effort over dough.
- Ergonomic handles – Contoured for hand comfort when rolling for long periods.
- Non-stick coating – Prevents dough from sticking to the handles.
Non-Stick Surface
Non-stick pins prevent dough from sticking in the engravings, making them much easier to work with.
- Wood and silicone – Naturally non-stick materials. Can be sanded smooth if needed.
- Floured – Any pin can be floured before rolling to keep the dough from sticking.
- Oiled – Ceramic and metal pins can be lightly oiled for a slick surface.
Preparing Dough for Embossing
Properly preparing the dough is one of the most important steps for getting a defined embossed pattern. Here are some tips:
- Chill dough first – Cookie, pie, pastry and yeast dough should be thoroughly chilled before rolling to make it easier to handle and hold a pattern.
- Avoid overworking – This can cause dough to become too warm and sticky to emboss cleanly.
- Light flour – Use flour sparingly on the work surface, dough and rolling pin to prevent sticking without drying out the dough.
- Even thickness – Roll dough to an even thickness so the pattern embosses uniformly.
- Work quickly – Roll dough in a cool room and move fast to prevent it from becoming warm.
- Rest if needed – If the dough gets too soft, return it to the fridge to firm up again before continuing.
- Use texture – Look for dough that is smooth but not sticky. Add flour or water as needed.
Rolling Technique
With properly prepped dough, the actual rolling technique is easy. Follow these steps for beautiful embossed results:
- Shape dough – On a floured surface, shape dough into a round, oval or square about 1/2-inch thick.
- Apply pressure – Place the pin in the center of the dough and apply even, downward pressure as you roll.
- Roll one direction – Roll away from you only, rotating dough 90 degrees after each pass.
- Add flour – Use flour sparingly on the work surface and pin as needed to prevent sticking.
- Check thickness – Roll until dough is uniformly thick. The ideal thickness depends on the recipe.
- Roll outward – For pie crusts and rectangles, roll from the center outward to maintain shape.
- Roll sideways – For large sheets like cookies, roll from side to side evenly.
- Check imprint – Periodically lift and check the bottom of the dough to ensure the pattern is transferring.
- Move to pan – Once rolled, carefully move the dough directly to the pan or baking sheet.
Baking Tips
To make sure embossed patterns remain visible after baking:
- Chill first – Return sheets or pie crusts to the fridge or freezer for 10-15 minutes before baking. This sets the design.
- Avoid reshaping – Once in the pan, try not to stretch or spread dough which can diminish imprinting.
- Watch temperature – Bake at the correct temp to prevent over-browning that could obscure imprints.
- Gently remove – Let items cool completely on a wire rack before gently removing from the pan.
- Glaze lightly – With cookies and pastries, opt for light drizzle or dustings to allow imprints to show.

Recipe Ideas
An embossed rolling pin can add interest to so many baked recipes including:
Cookies
- Sugar cookies – Choose a small repeated pattern like polka dots, stars, waves, spirals or stripes. Have fun mixing and matching different shapes.
- Shortbread – Roll out dough and emboss with simple lines, diamonds or rectangles. Makes elegant edible gifts.
- Gingersnaps – Roll out individual cookies and imprint them with gingerbread house or gingerbread man designs. Adorable!
- Linzer cookies – Press the pattern into the bottom cookie layer only so it shows through jam filling on top.
Pies
- Fruit pies – Make the crust the star by embossing it with large floral designs like roses or magnolias. Stunning edge for berry pies.
- Pot pies – Imprint the top crust of savory chicken, beef or vegetable pot pies for a rustic handmade look.
- Mini pies – Emboss crusts for single-serving hand pies with fall leaves, sunbursts or other freeform patterns.
- Lattice crusts – Weave embossed strips of dough for next-level beautiful lattice-top pies.
Pastries
- Croissants – A zig-zag pattern mimics the layers of a croissant. Roll gently over mostly folded dough.
- Danish pastries – Weave, circular or floral motifs complement the shape. Add contrasting filling.
- Strudel – Imprint thinly rolled filo or phyllo dough with an all-over ornate pattern. Carefully stretch onto the pan.
- Palmiers – Emboss puff pastry with a simple criss-cross design before shaping it into palm leaf cookies.
Quick Bread
- Scones – Roll out circles of dough, cut out shapes and imprint tops before baking.
- Biscuits – Gently imprint drop biscuit dough with small flourishes before baking for a pretty added touch.
- Rolls – Pattern yeast roll dough, shape it into rounds or knots, let rise, and bake. Fancy bakery-style finish.
- Cinnamon rolls – Add swirls or other designs to the rolled dough before shaping it into classic cinnamon rolls.
The possibilities are endless for the patterns you can add to your baked goods. Have fun experimenting with different embossing designs to make your cookies, pies and pastries true works of art.

Conclusion
An embossed rolling pin can elevate your home baking with beautiful designs pressed right into your doughs and batters. With the right rolling pin, well-prepared dough and proper technique, you can easily imprint cookies, pies, pastries and much more.
Not only does embossing make your baked goods look stunning, but it also adds an intriguing texture that makes items even more delicious to eat.
Unleash your inner artist in the kitchen with the charm and creativity of an embossed rolling pin. Your friends and family will be amazed and delighted with your gorgeous results!
