
How To Make Homemade Biscuits: A Flaky, Buttery Delight
Have you ever felt like a screaming cat in the kitchen, especially when your biscuit attempts seem more like baking blunders? Well, it’s time to

Learn how to make homemade pizza with a simple, delicious recipe that rivals your favorite restaurant! This dough is a breeze to prepare and bakes into a golden delight.
Smother it in savory pizza sauce, sprinkle generously with mozzarella, and add your chosen toppings for an irresistible treat.
Don’t miss out on my exciting Pepperoni Supreme and Veggie Delight Pizza recipes coming up next!
There’s something magical about a homemade pizza night! This fabulous pizza crust recipe is not only simple to make but also bakes into a gorgeous golden hue, offering a crust that’s crispy on the outside while remaining wonderfully soft and fluffy inside. (If you usually skip the crust, prepare for a change of heart!) 🍕

What’s also impressive about this crust is its robust structure, providing just the perfect thickness. Feel free to load up your toppings; this crust is up to the task!
Be sure to check out my expert advice, convenient make-ahead options, and inspiring topping ideas below!
Refer to the recipe card at the end of this post for detailed ingredient measurements and complete instructions.

Begin by dissolving the yeast in a small bowl, mixing it with sugar and lukewarm water (105-115°F). Cover this with plastic wrap and leave it to activate for about 5 minutes.
In a separate medium-sized bowl, combine half the quantity of flour with salt and garlic powder, stirring well. Pour in the activated yeast mixture and oil, then gradually incorporate the remaining flour.
Knead the dough for 3-5 minutes, then move it to a clean bowl. Cover with plastic wrap and allow it to rise until it’s increased by half its size, which takes about 30-60 minutes, or you can leave it overnight in the refrigerator. Gently punch down the dough and give it a quick knead about 5 times. Roll it out into a 12-inch circle and carefully transfer onto a preheated, floured pizza pan (or stone).
Pierce the crust with a fork to prevent it from puffing up during baking. Lightly brush the surface with olive oil, then evenly spread your chosen pizza sauce over it.
Sprinkle cheese over the sauce, and add your favorite toppings. Place in a preheated 450°F oven and bake for 13-15 minutes. Once done, take it out, slice, and enjoy your delicious creation!
For this recipe, you can opt for either bread flour or all-purpose flour. Bread flour contains more protein, leading to higher gluten levels, which gives the dough more elasticity and results in a slightly chewier crust.
It’s advisable to weigh your flour for accuracy, as both types generally have the same weight.
Gluten-Free Flour Alternative: You can also use a 1-to-1 baking flour for a gluten-free version of this recipe.
The secret to perfect pizza is an extremely hot oven. While professional restaurants often cook their pizzas at temperatures exceeding 850°F, such extreme heat isn’t practical for home cooking.
A 450°F oven temperature delivers excellent results. It’s crucial to allow the oven to preheat thoroughly. Even when it indicates it’s ready, an additional 20 minutes of preheating, if feasible, is recommended for the best outcome.
Keep it in a sealed container and refrigerate for up to 3 days, or freeze it for a maximum of 3 months.
For frozen pizza, ensure it’s fully thawed before reheating – either overnight in the refrigerator or using a microwave’s thaw/defrost setting.
Set your cold pizza on a rimmed baking sheet and loosely cover it with foil, creating a tent-like shape to avoid contact with the pizza. This step helps retain moisture.
Position the sheet on the bottom rack of your oven. Preheat the oven to 275°F and bake for 25-30 minutes.
Though this method takes some time, it’s the most effective way to revive your pizza to its initial, delicious state.
Follow the recipe to prepare your dough. Rather than rolling it out, form it into a ball and give it a light coating of nonstick cooking spray. Wrap the ball securely in plastic wrap, then place it in a Ziploc freezer bag.
It can be refrigerated for 3-4 days or frozen for up to 3-4 months.
Allow the frozen dough to thaw in the refrigerator for approximately 8 hours or overnight.
Before preparation, let it rest at room temperature for 30 minutes, then proceed with your pizza recipe as planned.

Mastering how to make homemade pizza is a culinary delight. This guide provides you with all the essential information, from preparing the perfect dough and selecting the best flour to optimizing oven temperature for that golden crust.
Discover a variety of toppings to suit every taste, and learn expert tips for rolling out dough, choosing the right salt, and picking the best cheese.
The guide also covers how to store and reheat leftovers, how to prepare dough in advance, and the essential tools needed for making pizza at home. Whether you’re a beginner or a seasoned cook, these insights will elevate your homemade pizza to the next level.

Have you ever felt like a screaming cat in the kitchen, especially when your biscuit attempts seem more like baking blunders? Well, it’s time to

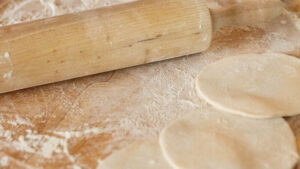
Every baker knows that a rolling pin can be both a best friend and a formidable foe in the kitchen. Mastering the art of removing

As the holiday season approaches, the charm of Christmas decorating candy becomes irresistible. It’s not just about the sweetness; it’s about adding a personal touch
A rolling pin is not just a baking tool; it’s an extension of a baker’s creativity. When it comes to DIY embossed rolling pins, the
Learn how to make homemade pizza with a simple, delicious recipe that rivals your favorite restaurant! This dough is a breeze to prepare and bakes

Have you ever felt like a screaming cat in the kitchen, especially when your biscuit attempts seem more like baking blunders? Well, it’s time to

Every baker knows that a rolling pin can be both a best friend and a formidable foe in the kitchen. Mastering the art of removing

As the holiday season approaches, the charm of Christmas decorating candy becomes irresistible. It’s not just about the sweetness; it’s about adding a personal touch