How To Make Homemade Pizza:Essential Tips and Precautions
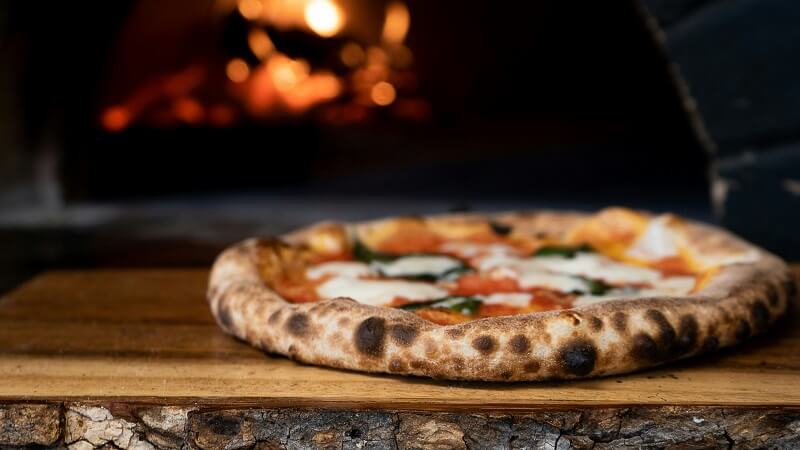
Learn how to make homemade pizza with a simple, delicious recipe that rivals your favorite restaurant! This dough is a breeze to prepare and bakes

Baking is an art that takes patience, precision, and passion. For many bakers, creating beautiful and delicious pastries is a creative outlet and a way to spread joy.
If you’re looking to step up your baking game and add an artistic flair to your creations, consider using an embossed rolling pin. These specialized baking tools can imprint patterns and textures onto your dough, elevating the look of your baked goods.
In this expanded blog post, we’ll dive deeper into the artistry of embossed rolling pins and how they can transform ordinary bakes into extraordinary masterpieces.

Rolling pins have been used for baking and cooking for thousands of years. The earliest known rolling pins dated back to the Roman Empire and were typically made from marble.
Wooden rolling pins became more common in the Middle Ages in Europe. These early rolling pins were simple tools used for rolling out dough.
It wasn’t until the 1700s in France that embossed rolling pins started becoming popular. As French baking became increasingly sophisticated, bakers sought tools to imprint patterns on their pastries.
Intricately carved wooden rolling pins were developed to press decorative designs into the dough. Some of the earliest embossed pins featured fleur-de-lis designs, paying homage to French royal crests.
This tradition of embellishing pastries continued, with bakers across Europe using embossed rolling pins, cake molds, and stamps to create ornate baked goods worthy of royalty. Elaborate molded cakes with decorations were beloved by the nobility.
The proliferation of embossed bakeware mirrored the lavish Baroque-style art and architecture popular in 17th and 18th-century Europe.
Today, the tradition of embossing and molding pastry dough continues, with embossed rolling pins featuring diverse global patterns and themes. From ancient Greek keys to modern geometric shapes, bakers can choose from rolling pins that will impress their desired design.
Beyond creating beautiful designs, using an embossed rolling pin has several advantages:
An embossed design immediately catches the eye and makes your bakes stand out. Even a simple pattern like lines or dots can elevate a basic pastry.
More intricate patterns like flowers, vines, animals, or landscapes can make your creation truly one-of-a-kind.
Pressing a pattern into the dough adds a tactile dimension to your bakes. This extra texture provides appeal for both the eyes and mouth.
Lattice designs, for example, add an appealing crispness. Dots give a tactile “bumpiness” that’s fun to bite into.
Embossed lines can be used to portion and cut dough into uniform sizes. No more fussing with a ruler or knife. Some rolling pins have measurement markings etched into the barrel to guide sizing.
Rolling over dough helps push out air pockets that can cause pastries to rise unevenly. A rolling pin is an excellent way to flatten the dough before baking. Patterns help burst bubbles that may be missed with a smooth rolling pin.
Using a rolling pin minimizes the need to overwork dough with your hands, which can develop tough gluten strands. The embossing effect also avoids long rolling motions that strengthen gluten.
Unlike icing or fondant decorations that are added after baking, embossed patterns bake into the pastry for decoration that won’t crack or fall off.
If you’re ready to buy an embossed rolling pin, there are a few considerations:

Once you’ve selected your embossed rolling pin, it’s time to put it to use:
For the crispest imprint, chill the dough thoroughly before rolling. The cold dough holds embossed patterns better than room-temperature dough. Some bakers even freeze dough briefly for maximum imprinting.
A light dusting of flour helps prevent sticking, but too much can obscure imprints. Only use as much as needed. Alternatively, try dusting cornstarch or powdered sugar if the discoloration is a concern.
Look at your rolling pin pattern and decide which way you want it to imprint. Position the dough accordingly and roll in the direction that embosses properly.
Applying consistent pressure as you roll creates an all-over imprint. Roll back and forth systematically to cover the entire surface without skipping areas.
Lift and inspect the dough periodically to ensure the pattern has transferred evenly across the dough. Re-roll any areas that need more imprinting.
If the dough becomes too warm and sticky, it won’t hold the embossed design. Work quickly from fridge to counter to pin, then baking sheet to minimize re-rolling.
Recipes suggest optimal dough thickness for imprinting. Thinner dough captures details best. The very thick dough won’t emboss thoroughly.
Ready to get rolling? Here are some delicious recipe ideas to try with your new embossed pin:
As you gain experience using your embossed rolling pin, you’ll get the feel for producing stunning edible art. Turning out trays of ornately decorated cookies or tarts feels like unveiling a cuisine masterpiece. With a little practice and imagination, you can master the art of elevated baking.
As you explore baking with your embossed rolling pin, you may encounter some challenges:
Don’t get discouraged if your imprinted designs aren’t perfect right away. As you gain experience using your embossed rolling pin, you’ll develop techniques for stunning results.
Like any cooking equipment, embossed rolling pins perform best with proper care:
With regular upkeep, your embossed rolling pin should provide years of decorating delicious baked creations. It’s worth the minimal maintenance required to keep this artistic baking tool in top shape.
There’s something special about revealing intricate designs imprinted on your pastry dough. Embossed rolling pins unlock new realms of edible artistry for bakers aiming to elevate their skills.
Whether you’re baking for a special occasion or just want to add everyday beauty to treats for your family, consider reaching for a textured rolling pin.
Let the pinned patterns transport your imagination from dough to a delectable work of art. Bake, impress, and spread joy with this artistic baking tool. Your inner baker will be delighted!


Learn how to make homemade pizza with a simple, delicious recipe that rivals your favorite restaurant! This dough is a breeze to prepare and bakes

Have you ever felt like a screaming cat in the kitchen, especially when your biscuit attempts seem more like baking blunders? Well, it’s time to

Every baker knows that a rolling pin can be both a best friend and a formidable foe in the kitchen. Mastering the art of removing

As the holiday season approaches, the charm of Christmas decorating candy becomes irresistible. It’s not just about the sweetness; it’s about adding a personal touch

Learn how to make homemade pizza with a simple, delicious recipe that rivals your favorite restaurant! This dough is a breeze to prepare and bakes

Have you ever felt like a screaming cat in the kitchen, especially when your biscuit attempts seem more like baking blunders? Well, it’s time to

Every baker knows that a rolling pin can be both a best friend and a formidable foe in the kitchen. Mastering the art of removing

As the holiday season approaches, the charm of Christmas decorating candy becomes irresistible. It’s not just about the sweetness; it’s about adding a personal touch
Copyright © 2024 bakemasterrollingpin. All Rights Reserved.